Linking Your Cardify Virtual Card to PayPal
Cardify is a popular virtual card provider that allows you to create virtual credit cards for online transactions. In this guide, we will walk you through the process of funding your PayPal account using a Cardify virtual card. By following these steps, you can easily add funds to your PayPal account and enjoy seamless online transactions.

Step 1: Create a Cardify Account.
- Visit the Cardify website and sign up for a new account.
- Complete the registration process by providing the necessary details and verifying your email address.
Step 2: Generate a Virtual Card
- Log in to your Cardify account.
- Navigate to the cards section.
- Click on the “Generate New Card” button to create a new virtual card.
- Specify the card details, such as card type (Visa/Mastercard), card limit, and expiration date.
- Once you have filled in the required details, click on the “Generate Card” button.

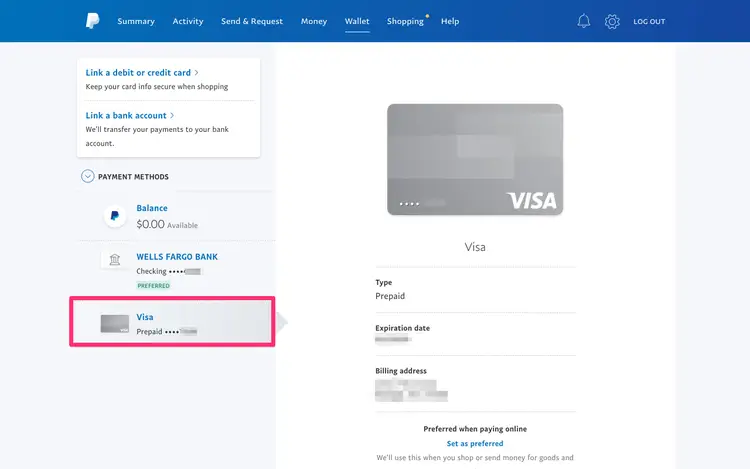
Step 3: Linking Your Cardify Virtual Card to PayPal
- Log in to your PayPal account.
- Go to the “Wallet” section, and click on “Link a Card or Bank” option.
- Select “Link a Card” and choose “Credit or Debit Card.”
- Enter the card details provided by Cardify, such as card number, expiration date, and CVV code.
- Fill in your billing address associated with the Cardify virtual card.
- Click on “Link Card” to add the Cardify virtual card to your PayPal account.
Step 4: Confirming the Card
- After adding the virtual card, PayPal will initiate a small transaction to verify the card.
- Check your Cardify account or associated email for the transaction details.
- Note the amount charged on your virtual card statement.
- Log in to your PayPal account and navigate to the “Wallet” section.
- Click on the virtual card you linked and select “Confirm My Card.”
- Enter the exact amount charged to your virtual card.
- Click on “Submit” to confirm the card.
Step 5: Funding Your PayPal Account
- Once your Cardify virtual card is confirmed, you can proceed to fund your PayPal account.
- Go to the “Wallet” section of your PayPal account.
- Click on “Add money” or “Transfer money” option.
- Select your Cardify virtual card as the funding source.
- Enter the amount you want to add to your PayPal account.
- Review the transaction details and click on “Continue” or “Add Funds” to complete the process.
By following these step-by-step instructions, you can easily fund your PayPal account using a Cardify virtual card. This enables you to make online transactions securely and conveniently. Remember to keep your virtual card details safe and secure to protect your funds.
Enjoy the seamless payment experience with PayPal and Cardify!